 |
I recently got a new climbing rope which is a single color. Some of my friends won't climb with me anymore because it's pink, but just in case I decided to mark the ends and middle. After doing way too much research on ways to mark a rope (various kinds of marking pens like Sharpies, whipping, and interweaving). Some references:
I decided to interweave as
Interweaving is a time-consuming process, as it must be done with care to avoid damaging the rope sheath (Not a big issue for the ends, but important for the middle!); and it is hard on the fingers of the hand pushing the needle. I found it helpful to cut off the fingertip of an old thin soft leather glove and slip that over my middle finger, which is the one I use behind the eye of the needle when working it through the weave.
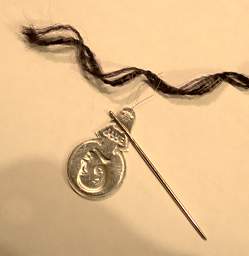
You will need a large-ish, blunt-tipped darning needle for this — you definitely do not want to use a regular sharp-pointed needle. You will also need a needle-threader, as the material you will be threading is a many-threaded strand which is next to impossible to thread without an aid. If you don't have either of these tools handy, ask your grandmother or visit your local sewing / quilting shop. I raided my mother-in-law's sewing chest. A sailor's palm can also be helpful for pushing the needle through once it's threaded under a strand, although I found it fairly easy to pull the needle through by hand.
Some have suggested using dental floss for the marking material; I decided to use strands from another piece of rope. I used nylon strands from the sheath of some black dynema I had left over from rigging some Big Bros. My piece was about 20" long, which was long enough to be easy to work with but not so long as to be difficult. Unless you use something like dental floss, the strand you are going to weave is composed of many fine threads, and they can get tangled and snarled if it's too long. Cut the rope from which the strand will come to the desired length. If it's easy to remove the core (it probably isn't), do so. Using the blunt-nosed needle, tease out one end of the desired strand, then continue picking it out until you have it completely removed. As you remove more strands it will become easier; once you can get a good grip on the strand you are removing you can pull it part way out of the rope, then "milk" the rest of the sheath back down the core; repeat the process until the strand comes free. For the first strand, you may have to pick it out most of the way.
Once you have the strand free, thread it into the blunt-nosed needle.
 |
| Blunt needle,
needle threader, and nylon sheath strand |
Start working on one end; mistakes here are not of much consequence so it's a good place to get the hang of it.
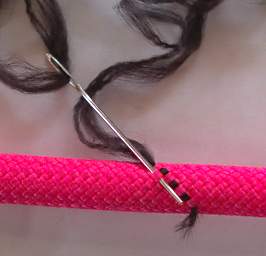
I wanted about an inch long mark near the end, so I started about two inches back from there. The last 1/2 inch or so of my rope had been partially fused together at the factory; in any case you don't want to mess up the very end of the rope so it starts unraveling. What you are going to do is thread the new strand along the weave of an existing strand in the rope sheath, going under the strands the existing strand also goes under. To help lock the new strand in place, I started weaving towards the middle of the rope for three tucks; then I did a U-turn and headed back towards the end.
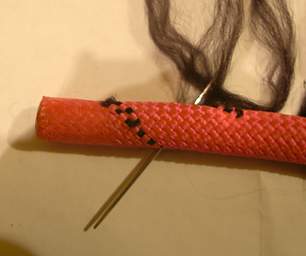
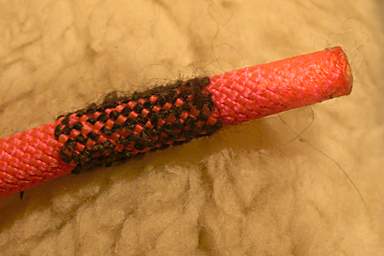
Continue this process until you have stitched completely around the rope, following the weave of the thread on which you started. I ended up a bit more than an inch down the rope. At that point you do another U-turn and head back towards where you started. When turning the corner, turn to the side opposite the one with the three stitches at the very beginning so you go clear up the other side. When you get back to the beginning, do another U-turn. Continue the process until you are out of thread. Then start with another thread where you left off. If you go completely around the rope, you will be left with a checkered mark as in the image below right. If you only make a few passes, you will be left with a checkered spiral stripe as in the image of the middle mark. If you go completely around and then thread along the other diagonal, you can fill in the other parts of the checkerboard to get a solid mark. However, with each pass it becomes slightly more difficult to thread under the existing rope strands. Filling in the opposite diagonal may be pretty difficult; I've never done it so I can't speak from experience.
 |
 |
 |
| The starting loop-back | The first pass done | End mark interwoven completely around in one direction |
For the center of the rope, I decided to just make a stripe four strands wide. I did this for the following reasons:
I started about four inches from the middle and wove until I had used up the strand I started with. Four strands got me the pattern in the image below.
 |
| center mark using four passes |
I've had limited experience with this rope as of this writing, but it appears the stripe I've added in the center makes it possible to locate the center by feel as well as sight due to the slight increase in stiffness and roughness of the sheath. The slightly increased stiffness and diameter seems to have minimal affect when belaying or rappelling.